
FREE Chunky Pumpkin
Crochet Pattern
designed by Crochet Arcade
Looking for a quick and easy pumpkin crochet pattern that doesn't require any sewing? Then you are in the right place!
To make this cute crochet pumpkin you only need 1 x 100g ball of our Cuddle Soft Chunky yarn in Marmalade or White Marshmallow and a 1 x 50 g ball of Cookie Dough colour for the stem.
If you would like a printable PDF version of this pattern you can join the Patreon page of a designer of this pattern here. As a member of this Patreon (tier 2 or 3), you will also get a 10-15% discount on our yarn and kits and an automatic entry in a £50 gift voucher giveaway every month as well as many other benefits.
PATTERN INFORMATION
CROCHET TERMS: UK Crochet terms. For the pattern in US crochet terms scroll to the bottom of the UK pattern.
SIZE:
W 18 cm x H 14 cm (7” x 5.5”)
MATERIALS:
Yarn weight: Chunky / Size 5 / 12-14 Ply
Yarn: Dreamy Wool Cuddle Soft Chunky Yarn
COLOUR A: Marmalade or White Marshmallow - 96 meters (89 g) – order 1 x 100g ball
COLOUR B: Cookie Dough - 5.4 meters (5 g) – order 1 x 50g ball
Other materials: 50g (1.76 oz) of hollowfibre toy stuffing
TOOLS:
6 mm crochet hook (J-10 UK size)
Tip you can use a smaller hook size (4.5 mm or 5 mm) for a smaller and harder pumpkin.
Scissors and yarn needle.
ABBREVIATIONS (UK terms):
Dc – Double Crochet
Dc2tog – Double Crochet Two Together (double crochet decrease)
Htr – Half Treble
Htr2tog -Half Treble Two Together (half treble decrease)
BPhtr – Back Post Half Treble
Ch – Chain
Sts – Stitches
Fig. - Figure
SPECIAL INSTRUCTIONS:
Dc2tog (Invisible decrease) instruction: Insert hook under the front lp only of the next two sts, yo and pull through those front lps, yo and pull through 2 lps on your hook.
Htr2tog (Invisible decrease) instruction: Yo and insert hook under the front lp only of the next two sts, yo again and pull through those front lps, yo and pull through all 3 lps on your hook.
BPhtr instruction: Yo and insert hook through the back to the right of the post of the next st, then insert it through the front, to the left of the same st. Yarn over and pull around the post of the st, yo again and pull through all 3 lps on your hook to complete the stitch.
PUMPKIN CROCHET PATTERN (UK TERMS):
The pumpkin is crocheted from the bottom up in a round. 1 ch and 2 ch at the start of the round don’t count as a st throughout the pattern so make the first st of the round at the bottom of the turning chain.
Using a 6 mm hook and colour A, make a magic ring.
Round 1: 1 ch, 6 dc in the centre of a magic ring, join to the first st with sl st. (6 sts)
Round 2: 1 ch, 2 dc in each stitch around, join. (12 sts)
Round 3: 2 ch [2 htr in next st, BPhtr in next st] x 6, join. (18 sts)
Round 4: 2 ch, [htr in next st, 2 htr in next st, BPhtr in next st] x 6, join. (24 sts)
Round 5: 2 ch, [htr in next 2 sts, 2 htr in next st, BPhtr in next st] x 6, join. (30 sts)
Round 6: 2 ch, [htr in next 3 sts, 2 htr in next st, BPhtr in next st] x 6, join. (36 sts)
Round 7: 2 ch, [htr in next 4 sts, 2 htr in next st, BPhtr in next st] x 6, join. (42 sts)
Round 8: 2 ch, [htr in next 5 sts, 2 htr in next st, BPhtr in next st] x 6, join. (48 sts)
Round 9: 2 ch, [htr in next 6 sts, 2 htr in next st, BPhtr in next st] x 6, join. (54 sts)
Round 10: 2 ch, [htr in next 7 sts, 2 htr in next st, BPhtr in next st] x 6, join. (60 sts)
Round 11: 2 ch, [htr in next 8 sts, 2 htr in next st, BPhtr in next st] x 6, join. (66 sts)
Round 12: 2 ch, [htr in next 10 sts, BPhtr in next st] x 6, join. (66 sts)
Rounds 13 to 15: Repeat round 12. (66 sts)
Round 16: 2 ch, [htr2tog, htr in next 8 sts, BPhtr in next st] x 6, join. (60 sts)
Round 17: 2 ch, [htr2tog, htr in next 7 sts, BPhtr in next st] x 6, join. (54 sts)
Round 18: 2 ch, [htr2tog, htr in next 6 sts, BPhtr in next st] x 6, join. (48 sts)
Round 19: 2 ch, [htr2tog, htr in next 5 sts, BPhtr in next st] x 6, join. (42 sts)
Round 20: 2 ch, [htr2tog, htr in next 4 sts, BPhtr in next st] x 6, join. (36 sts)
Round 21: 2 ch, [htr2tog, htr in next 3 sts, BPhtr in next st] x 6, join. (30 sts)
Round 22: 2 ch, [htr2tog, htr in next 2 sts, BPhtr in next st] x 6, join. (24 sts)
Round 23: 2 ch, [htr2tog, htr in next st, BPhtr in next st] x 6, join. (18 sts)
Pattern notes: Stuff the pumpkin with around 50 g (1.76 oz) of toy stuffing (Fig. 1). Fasten off colour A and start the next round using colour B to make the stem. Tie the ending tail of colour A with starting tail of colour B in a knot and hide it inside the pumpkin.
Figure 1

Figure 2

Round 24 (Fig. 3): 2 ch (or make a standing htr in the first st, see Fig. 2), htr in each st around, join. (18 sts)
Figure 3

Round 25: 2 ch, [htr in next st, htr2tog] x 6, join. (12 sts)
Round 26: 1 ch, dc2tog x 6, join. (6 sts)
Finishing instructions: Fasten off and stuff the stem with a small amount of stuffing. Close the top of the stem using the invisible finish method (Fig. 4). Weave in the end.
Figure 4

Figure 5

Figure 6

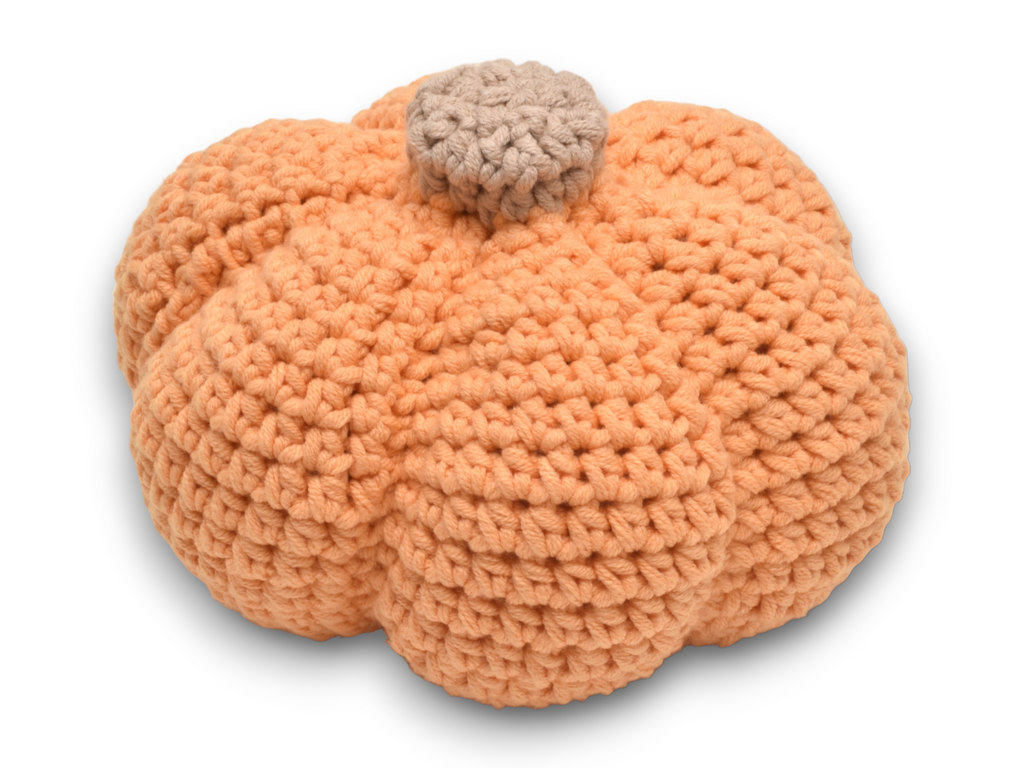
Optional: You can leave the pumpkin as it is (Fig. 5) or you can make dipper indentations in the pumpkin (Fig. 6). To make the indentations, cut 3 lengths (around 22”) of Colour A yarn. *Thread one 22” strand of yarn through the yarn needle and then through the lps of sts where the BPhtr sts are on both sides of the pumpkin (Fig. 7). Starting from the edge of the stem, down through to the bottom of the pumpkin (Fig. 8), and then up through to the other side, once you get back up to the stem thread the yarn underneath the stem so it meets the starting tail (Fig. 9). Take the tail off the needle, grab both ends, tie a knot, and pull until you get the indent you like, holding in that position tie another knot to secure it (Fig. 10).*
Repeat from * to * in 2 more places (as shown by arrows in Fig. 8) to achieve 6 indentations in total.
Figure 7

Figure 8

Figure 9

Figure 10

I hope you will enjoy using this pattern. I would love to see your finished pumpkin in our Facebook group.
Also don’t forget to pin it to your Pinterest board so you can easily find it in the future!

CHUNKY PUMPKIN PATTERN
IN US CROCHET TERMS
PATTERN INFORMATION
CROCHET TERMS: US Crochet terms.
SIZE:
W 18 cm x H 14 cm (7” x 5.5”)
MATERIALS:
Yarn weight: Chunky / Size 5 / 12-14 Ply
Yarn: Dreamy Wool Cuddle Soft Chunky Yarn
COLOR A: Marmalade - 96 meters (89 g) – order 1 x 100g ball
COLOR B: Cookie Dough - 5.4 meters (5 g) – order 1 x 50g ball
Other materials: 50g (1.76 oz) of hollowfiber toy stuffing
TOOLS:
6 mm crochet hook (J-10 US size)
Tip you can use a smaller hook size (4.5 mm or 5 mm) for a smaller and harder pumpkin.
Scissors, yarn needle, stitch marker.
ABBREVIATIONS (US terms):
Sc – Single Crochet
Sc2tog – Single Crochet Two Together (single crochet decrease)
Hdc – Half Double Crochet
Hdc2tog -Half Double Crochet Two Together (half double decrease)
BPhdc – Back Post Half Double Crochet
Ch – Chain
Sts – Stitches
Fig. - Figure
SPECIAL INSTRUCTIONS:
Sc2tog (Invisible decrease) instruction: Insert hook under the front lp only of the next two sts, yo and pull through those front lps, yo and pull through 2 lps on your hook.
Hdc2tog (Invisible decrease) instruction: Yo and insert hook under the front lp only of the next two sts, yo again and pull through those front lps, yo and pull through all 3 lps on your hook.
BPhdc instruction: Yo and insert hook through the back to the right of the post of the next st, then insert it through the front, to the left of the same st. Yarn over and pull around the post of the st, yo again and pull through all 3 lps on your hook to complete the stitch.
PUMPKIN CROCHET PATTERN (US TERMS):
Pumpkin is crocheted from the bottom up in a round. 1 ch and 2 ch at the start of the round don’t count as a st throughout the pattern so make the first st of the round at the bottom of the turning chain.
Using a 6 mm hook and color A, make a magic ring.
Round 1: 1 ch, 6 sc in the center of a magic ring, join to the first st with sl st. (6 sts)
Round 2: 1 ch, 2 sc in each stitch around, join. (12 sts)
Round 3: 2 ch [2 hdc in next st, BPhdc in next st] x 6, join. (18 sts)
Round 4: 2 ch, [hdc in next st, 2 hdc in next st, BPhdc in next st] x 6, join. (24 sts)
Round 5: 2 ch, [hdc in next 2 sts, 2 hdc in next st, BPhdc in next st] x 6, join. (30 sts)
Round 6: 2 ch, [hdc in next 3 sts, 2 hdc in next st, BPhdc in next st] x 6, join. (36 sts)
Round 7: 2 ch, [hdc in next 4 sts, 2 hdc in next st, BPhdc in next st] x 6, join. (42 sts)
Round 8: 2 ch, [hdc in next 5 sts, 2 hdc in next st, BPhdc in next st] x 6, join. (48 sts)
Round 9: 2 ch, [hdc in next 6 sts, 2 hdc in next st, BPhdc in next st] x 6, join. (54 sts)
Round 10: 2 ch, [hdc in next 7 sts, 2 hdc in next st, BPhdc in next st] x 6, join. (60 sts)
Round 11: 2 ch, [hdc in next 8 sts, 2 hdc in next st, BPhdc in next st] x 6, join. (66 sts)
Round 12: 2 ch, [hdc in next 10 sts, BPhdc in next st] x 6, join. (66 sts)
Rounds 13 to 15: Repeat round 12. (66 sts)
Round 16: 2 ch, [hdc2tog, hdc in next 8 sts, BPhdc in next st] x 6, join. (60 sts)
Round 17: 2 ch, [hdc2tog, hdc in next 7 sts, BPhdc in next st] x 6, join. (54 sts)
Round 18: 2 ch, [hdc2tog, hdc in next 6 sts, BPhdc in next st] x 6, join. (48 sts)
Round 19: 2 ch, [hdc2tog, hdc in next 5 sts, BPhdc in next st] x 6, join. (42 sts)
Round 20: 2 ch, [hdc2tog, hdc in next 4 sts, BPhdc in next st] x 6, join. (36 sts)
Round 21: 2 ch, [hdc2tog, hdc in next 3 sts, BPhdc in next st] x 6, join. (30 sts)
Round 22: 2 ch, [hdc2tog, hdc in next 2 sts, BPhdc in next st] x 6, join. (24 sts)
Round 23: 2 ch, [hdc2tog, hdc in next st, BPhdc in next st] x 6, join. (18 sts)
Pattern notes: Stuff the pumpkin with around 50 g (1.76 oz) of toy stuffing (Fig. 1). Fasten off color A and start the next round using color B to make the stem. Tie the ending tail of color A with starting tail of color B in a knot and hide it inside the pumpkin.
Round 24: 2 ch (or make a standing hdc in the first st, see Fig. 2), hdc in each st around, join. (18 sts)
Round 25: 2 ch, [hdc in next st, hdc2tog] x 6, join. (12 sts)
Round 26: 1 ch, sc2tog x 6, join. (6 sts)
Finishing instructions: Fasten off and stuff the stem with a small amount of stuffing. Close the top of the stem using the invisible finish method (Fig. 4). Weave in the end.
Optional: You can leave the pumpkin as it is (Fig. 5) or you can make dipper indentations in the pumpkin (Fig. 6). To make the indentations, cut 3 lengths (around 22”) of Color A yarn. *Thread one 22” strand of yarn through the yarn needle and then through the lps of sts where the BPhdc sts are on both sides of the pumpkin (Fig. 7). Starting from the edge of the stem, down through to the bottom of the pumpkin (Fig. 8), and then up through to the other side, once you get back up to the stem thread the yarn underneath the stem so it meets the starting tail (Fig. 9). Take the tail off the needle, grab both ends, tie a knot, and pull until you get the indent you like, holding in that position tie another knot to secure it (Fig. 10).*
Repeat from * to * in 2 more places (as shown by arrows in Fig. 8) to achieve 6 indentations in total.