
Have you ever given someone a beautiful crocheted or knitted gift you made that they loved, but after a while, they came back to you asking you to fix it because a lot of yarn ends came out after a wash?
In the best scenario, the ends come out and no stitches unraveled, and you are local to the person who received your gift, so you can fix it for them. In the worst scenario, the stitches unraveled, or the person lives far away from you, and they don't really know how to fix the ends themselves and they end up putting your gift away and never using it again.
If you want to avoid situations like this, make sure that your ends are secure and won't come out before you give the handmade gift you spend so much time making to someone.
Don't worry though I got you covered with two amazing tutorials for the most secure methods of hiding the ends, so you don't need to worry about the ends coming out and your gift unraveling in the future.
There are two types of ends you have to weave in:
1) The ends when you finished your project or finished with the colour.
2) The ends from joining a new ball of yarn.
For the first type, see my tutorial on how to weave in the ends, so they don't unravel.
For the second type, read this Magic Knot tutorial which is the most secure method of joining new yarn, and it doesn't require weaving in any ends!
If you prefer the video tutorial, then head to our Instagram, but if you prefer photos and written descriptions, read the tutorial below.
MAGIC KNOT TUTORIAL - JOINING NEW YARN
Step 1 – Wrap your new yarn around the old yarn, a few inches away from the end


Step 2 – Tie a knot


Step 3 – Now wrap the tail of the old yarn around the new yarn and tie a knot.


You will end up with something like this:

Step 4 – Pinch the working ends of the old and new yarn and pull them in opposite directions (away from each other) to bring the knots together.


Step 5 – Pull the yarn a few more times to tighten the knots. Cut off the yarn ends as close to the knots as you can.


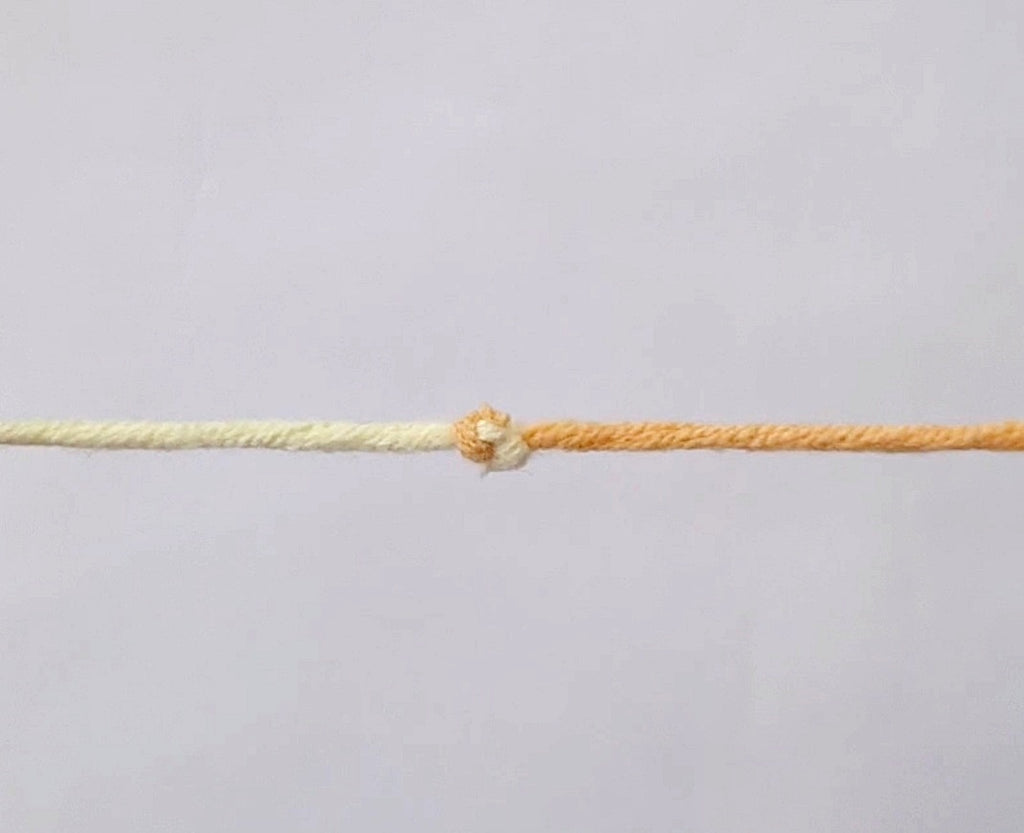
That's the finished Magic Knot.

Below you can see what the Magic Knot looks like when worked into crochet stitches. It would obviously be less visible if we used the same colour yarn.
Extra tips for hiding the knot:
Tip 1. If the knot ends up on the outside, undo a few stitches and try to make them tighter or looser, so the knot ends up inside the stitches rather than on the outside of the stitch.
Tip 2. If you are making a blanket, mark one side with the stitch marker and try to keep all the knots, and weave in the ends on one side, so you have one pretty side (right side) and one less pretty with the knots. You can add a nice applique, or your label to the right side, so the user will know which one should be up.
Tip 3. If you are making an amigurumi, hiding the knots is very simple. Just manipulate the tension so the knot will end up on the wrong side (the inside of the toy).

Have a go and try this method yourself! If you enjoyed this Magic Knot tutorial, Please share it on your social media platforms. Hopefully, others will find this technique helpful too!