
When making things as heavily used as keyrings, you have to use a durable yarn that doesn't pill easily like our Dreamy Wool Cuddle Soft Chunky yarn.
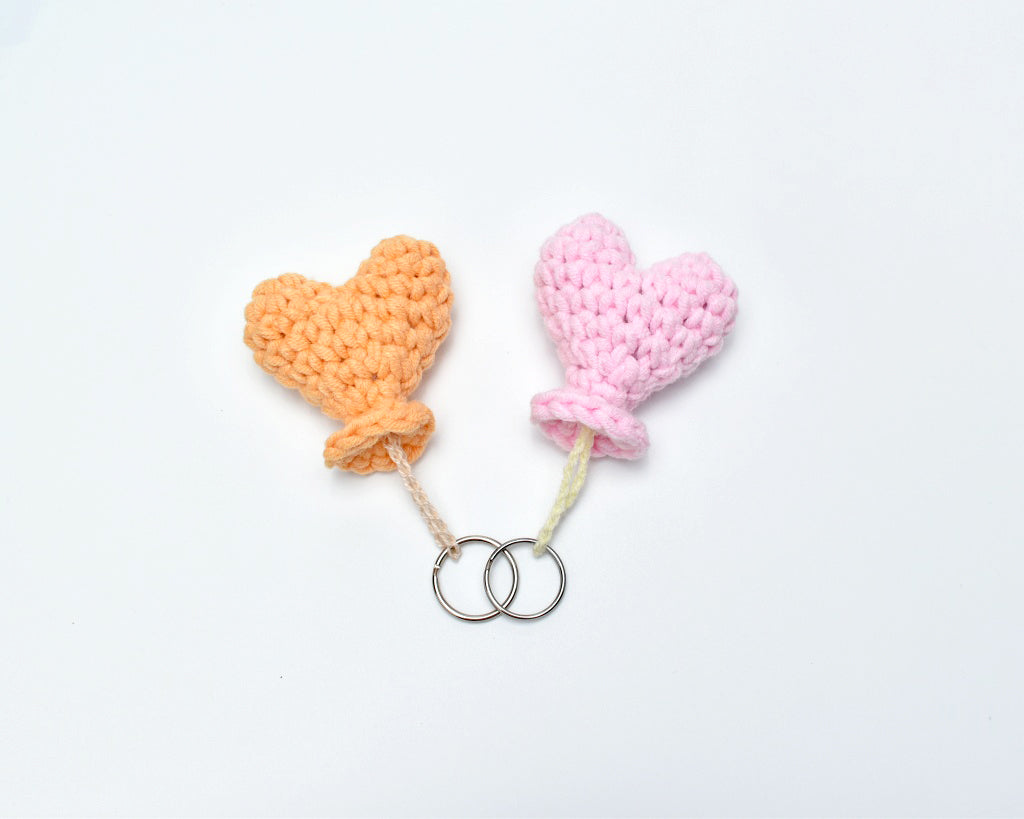
Keyrings are very practical and quick to make gifts. They can also be used as bag charms. This particular crochet heart keyring will go on my daughter's school book bag.

SIZE:
6 cm x 6 cm (2.5” x 2.5”)
MATERIALS:
Yarn weight: Chunky / Size 5 / 12-14 Ply
Yarn: Dreamy Wool Cuddle Soft Chunky Yarn
MC - 15 meters of Candy Floss Colour - 23 g
50 cm (20") of embroidery thread or thin yarn for chain attachment.
Toy stuffing
If you buy a 1 x 50 g ball, you will be able to make 3 heart balloon key chains from it.
TOOLS:
6 mm crochet hook (J-10 US size)
3 - 3.5 mm hook for chain string.
Scissors, Yarn Needle, stitch marker.
GAUGE:
10 dc x 14 rows crocheted in a spiral round.
CROCHET TERMS: UK Crochet terms.
If you use US crochet terms, remember that UK's double crochet (dc) is the same stitch as single crochet (sc) in US terms (the one without yarn over first).
ABBREVIATIONS (UK):
MC- Main colour
WS- Wrong side
RS- Right side
Dc – Double Crochet
Ch – Chain
Sts – Stitches
CROCHETING DIRECTION:
The crochet heart is crocheted in a spiral round.
When you crochet in a Spiral Round, attach a stitch marker on the last stitch at the end of each round and move it up on the last stitch of each round as you make them. Alternatively, always mark the first st with the stitch marker instead of the last st. At the end of each round, do NOT join to the first st of the round and do NOT make a starting chain before starting a new round. Work first st of the new round directly on top of the first st from the previous round.

HEART BALLOON KEYCHAIN CROCHET PATTERN:
Using your chosen colour and 6 mm hook, make a magic ring.
Row 1: 1 ch, 6 dc in the centre of a magic ring. (6 sts)
Row 2: [2 dc in next st, dc in next st] x 2. (8 sts)
Row 3: Dc in each stitch around. (8 sts)
Cut off the yarn and pull the hook all the way up to unravel the working loop.
Put your work away for now. Take the same hook and make another magic ring, then make rows 1 to 3 above to create the 2nd dome of the heart. Do not cut the yarn off on the second dome, as we will continue making the rest of the heart from that point.

Before continuing, turn your work to the WS, pull on the starting tail to tighten the ring and weave in the end. Repeat on the 2nd dome. Do not weave in the ending tail on the first dome yet.

Now we will join both parts together by crocheting around both parts.
Take the 2nd dome (with the ball attached to it) and pick up your first dome. Insert your hook in to the first stitch of the last round on the 1st dome you made and follow the pattern below.


Row 4: Dc in each st around (around both domes). (16 sts)
Photo of finished row 4.

After this round, you'll notice a big hole between the two domes. Thread the ending tail from the first dome on the yarn needle and sew on the gap.
Photo showing top view of domes after sewing the hole.

Photo showing the inside of domes after sewing the hole.

Row 5: Dc in next 3 sts, dc2tog, sc in next 6 sts, dc2tog, dc in next 3 sts. (14 sts)
Row 6: Dc in next 3 sts, dc2tog, sc in next 4 sts, dc2tog, dc in next 3 sts. (12 sts)
Row 7: [dc2tog] x 6. (6 sts)
Row 8: Dc in each stitch around. (6 sts)
Row 9: 2 dc in next 6 sts. (12 sts)
FINISHING:
Fasten off using the invisible fasten off method for the best finish and weave in the tail.
Stuff the heart with a small amount of toy stuffing.
INSTRUCTION FOR THE KEY CHAIN ATTACHMENT:
Take around 50 cm (20") embroidery thread or a thin yarn using matching colour. I've used 1 strand from our Custard colour yarn for the pink heart and cream embroidery thread for the orange heart.
Make 20 chains, join to the first chain with a slip stitch and fasten off. Cut off the yarn leaving around 15 cm tail. Tie a couple of knots with both ends. Then thread the longer end on the yarn needle and thread around row 8 of the balloon. Thread the yarn to the centre of the balloon and pull on the tail to close the hole in the balloon. Tie 2-3 knots with the second tail to secure the attachment, then weave in the rest of the tail.

Remember we are adding a new crochet pattern at least once a week! Subscribe to our newsletter to get the information about new patterns straight in your inbox.
Do you like this pattern? Please share on social media with your crochet friends.